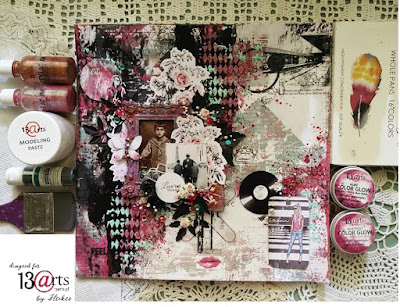
Wednesday, March 22, 2023

"Kindness unlocks doors" canvas for ScrapFx

 Good morning my dear friends,

and welcome to my second blog post for the company ScrapFx.

Once again I created a canvas for my studio with the wonderful products of Scrapfx.

Lets start.

I used the beautiful doorway 2 collage paper which I torn apart

 and I glue it with gel medium to the background. After that I stamped with versafine ink

and the ScrapFx brick wall stamp. I add over the wet ink silver embossing powder.

I painted the chipboards with raw umber paint and I added the left over paint to my canvas as well.

Next step was glueing my title, the chipboards and the paper dolls.

A little bit decorating with 3D powertex balls and glas pearls and my canvas was done.


Kindness unlocks doors...


I used from ScrapFx:

cherish word chipboard

doorway 2 collage paper
doorway 4
heart chipboard
heart trails boarder
Sketchy numbers
Brick wall stamp

I hope you like my canvas as I do.

See you in a couple of days for my third blog post.

Have a wonderful day.

xoxo

Sunday, March 19, 2023

ScrapFx Canvas "DANCE"

Hello

my dear blog reader,

today`s sharing is for the company ScrapFx.

I created a canvas in the 25 cm by 25 cm.

Photo credit: https://www.instagram.com/baevfoto/?hl=en fine art & portrait photographer Ukraine.

At the moment I like to create some canvases for my new studio.

DANCE like no one is watching...


I started my canvas by adding a thorn piece of paper from 13arts.

Than I added a layer of clear gesso all over the canvas.

Following by stamping with black ink and black embossing powder.

My next step was adding texture with a large opening stencil and a mixture 

of multipurpose gel medium and color glow.

This was quite a thick layer so I let it dry over night.

The next day I glued my embellishments and focale point to the canvas.

 Lots of splatters in gold and black came after that.

I also painted my chipboards from ScrapFx with gold paint.

Here are the product which I used from ScrapFx:

Skull transparency


Gear stamp


Dance chipboard


Kites stencil


Tango dancers chipboard


I hope you like my canvas inspiration for the company Scrapfx.

I see you over a couple of days for my next blog post.

Until then

xoxo Heike


Thursday, March 16, 2023

13arts Mixed Media Canvas "NOTES"

 Hello my dear followers,

how are you today?

At the moment I am with my hubby on Spring Vacation 

on the beautiful Canaries island.

For my 13arts design team project in March I created for you a canvas in the size 25 cm by 25 cm.

I started my background with adding white gesso to the canvas.

I used a spatular for this step. After everything was dry,

 I cretaed texture on my canvas with multipurpose gel medium the stencil postcard from France and 

WOW embossing powder. This looks always very pretty as texture in the background.

The next step was adding my focale point and all the embellishments.

I used also the multipurpose gel medium as glue. After everything was dry I added a bit color 

here and there to my layers, following by 3D powertex balls, pearls and glitter.

NOTES...


A closer look to my canvas:
Lots of embellishments from the Industriale Zone paper collection.


I used the stencil Postcard from France with Multipurpose gel medium and WOW embossing powder.


Color Glow is always a beautiful use for a finish touch.

This is a photo collage with one of the products which I used for this project.


I hope you feel a bit inspired to create with the beautiful products of 13arts.

Here is a link to the store: https://13arts.pl/

photo credit: https://www.instagram.com/baevfoto/?hl=en

Have a wonderful day. 

Heike

Wednesday, March 1, 2023

March Challenge 13arts

 Hello everyone,

and welcome to my March challenge inspiration for the company

13arts.

We have an amazing mood board image to play with.

Perfect for the Secret Garden paper collection which I used on my page.

The challenge from 13arts runs only on the Instagram account.

Some rules for the challenge are: 

Add the mood board image to your post.

Use at least one product of 13arts.

Add to your post the #13artsmar23

Tag 13arts in your post and follow 13arts.

Have fun with the challenge.


Unforgettable...


A closer look to my page.
The vintage photo comes from Finnabair.
The moulds comes from Prima Marketing.
My embellishments products from 13arts comes from the Secret Garden paper collection.
My background paper is from the Unforgettable paper collection also from 13arts.


This is the beautiful mood board.


So my dear friends, I hope you like my challenge inspiration for the month of March.

Have a wonderful creative month.

Xoxo Heike 

Sunday, February 26, 2023

Scrapbook Layout #2 for 13arts

 Hello

my dear followers, how are you today.

Welcome to my second design team blog post for the company 13arts in the month of February.

I created a scrapbook layout on a white cardstock paper with lots of stencils and stamps from 13arts.


I had a lot of fun designing this funky page. I used for my focal point one of the tiny dolls

from Tim Holtz. The embellishments are from the Young and Free collection and from the 

Mr. Handsome paper collection.

Birthday Girl...


A closer look to my page...
My mediums are lots of Distress Ink and Archival Ink
Black Gesso, Gel medium and Clear Gesso as well.


This is the photo collage with some of the 13arts products.


Thank you so much for visiting today my blog post I appreciate it very well.
Have a wonderful day.
xoxo


Wednesday, February 22, 2023

"She is a Peacock" Canvas Layout for ScrapFx

 Hello my dear followers

 and welcome to my second design team inspiration for the company:

ScrapFX

I created a canvas layout in the size 25cm x 25cm.

The ScrapFx February release is still the theme "Steampunk".

I used the beautiful steampunk peacock chipboard as my focale point and with

the quote from Oscar Wilde in my head, I know I needed also a matching photo.

The quote from Oscar Wilde goes

                    She is a peacock

                    in everything but

                    beauty.


A closer look to my canvas:
I started with adding Acrylic colours to my background.
The colours are: light blue, turquise, rosegold, yellowgreen and white.
After everything was dry very well I glued the collage paper and a transparency skull with gel medium to my background.
I used the collage paper: dem bones and anatomy, and the transparency skulls.
The next step was stamping with Versafine and embossing with WOW embossing powder.
I used the branch A stamp.
After that I painted the peacock with white gesso.
While my chipboard was air drying I collected the things that I wanted on my canvas, so as:
art stones, flowers, fabric, rosegold wire, moss, glitter, gears, sequins, washi tape 
and embellishments from 13arts.
Then I glued everything with multipurpose gel medium to my canvas and I let it air drying.


The next morning I added colour to my canvas.
The colours are from 13arts called: Color Glow and I used (goldstone, larimar, turquoise, golden calcite, amber, citrine and emerald) and Rainbow colour I used (orange)
and Finnabair wax.

I think my Peacock-Girl looks unique, powerfull and even a bit of divinity.
My Peacock-Girl reminded me to seek out and appreciate the spectacular beauty that is all around me.


These are the products which I used from ScrapFx:

branch A stamp

dem bones collage paper

anatomy collage paper

skulls transparency

Steampunk peacock chipboad


My photo is from : https://www.instagram.com/marcin_nagraba/?hl=en he is a Polish photographer.


I hope you like my second inspiration this month .
Thank you so much for visiting my blog post .
I appreciate it very well.
Until then ..
xoxo
Heike

Tuesday, February 21, 2023

My New Atelier

 Hello everyone,

today I want to show you some photos of my new studio.

Since the end of last year my handsome hubby and I are empthy nest parents

and I got two of our four children bedrooms for my hobby.

How nice it is to be creatively busy between all my treasures and favorite products is just 

indescribably wonderful.

I initially had a different arrangement of the furniture in the first place,

but after a few weeks of creating in my studio I changed a few things.

I set up an additional crafting table by the window and

 I swapped two tables which I already had in my studio.

I`ve also decorate the walls with some Art and I hung up several fairy-lights.

Fairy-lights are so charming and always makes me happy.

My studio...


This is the new (old) table by my window. The table is from the fifties.
my chair is from Ikea. The main colour in my studio is poisen ivory, that is a lovely
green colour. The white kitchen cabinet contains all my sewing products.
On the right side of the table is a Räskog trolley from Ikea with all the things 
which I need at most when I am busy.


In the foreground is an oval table with all my 13arts mediums.


This is my Tim Holtz and DIE cutting cabinet.


This cabinet holds all my stamps.


 This is the place where all the magic begins.


Under the stairs I have a cozy little worksplace and lots of storage space.

I hope you like my little piece of heaven.

For me this room is a long awaited dream that has come true

 so I`m really grateful for what I have.

Thanks for you visit and happy creating my dear follower.

Until then.


"Kindness unlocks doors" canvas for ScrapFx

 Good morning my dear friends, and welcome to my second blog post for the company ScrapFx. Once again I created a canvas for my studio with ...